Lash Mapping for Beginners: Where to Start
When you first learn eyelash extensions, lash mapping can feel much more complicated than it needs to be.
You see maps online filled with numbers, curls, layers, spikes and styling names, and it can look as though you need to memorise dozens of different designs before you can create a beautiful set.
You don't.
For a beginner, lash mapping is really about learning one fundamental skill:
How to choose extension lengths and place them across the eye to create a balanced shape.
After more than 12 years working as a lash technician and years teaching lash students, I believe beginners benefit much more from understanding why a map works than simply copying numbers from somebody else's photograph.
Once you understand the basics, creating your own maps becomes much easier.
What Is Lash Mapping?
A lash map is a plan showing how you intend to style an eyelash extension set.
Before or during the appointment, you divide the lash line into sections and decide which extension lengths will be used in each area.
For example, a simple map might gradually increase in length from the inner corner towards the middle or outer part of the eye before becoming shorter again.
The map gives you a guide while you work.
Instead of deciding the length of every extension individually, you already know the overall shape you are trying to create.
Why Is Lash Mapping Important?
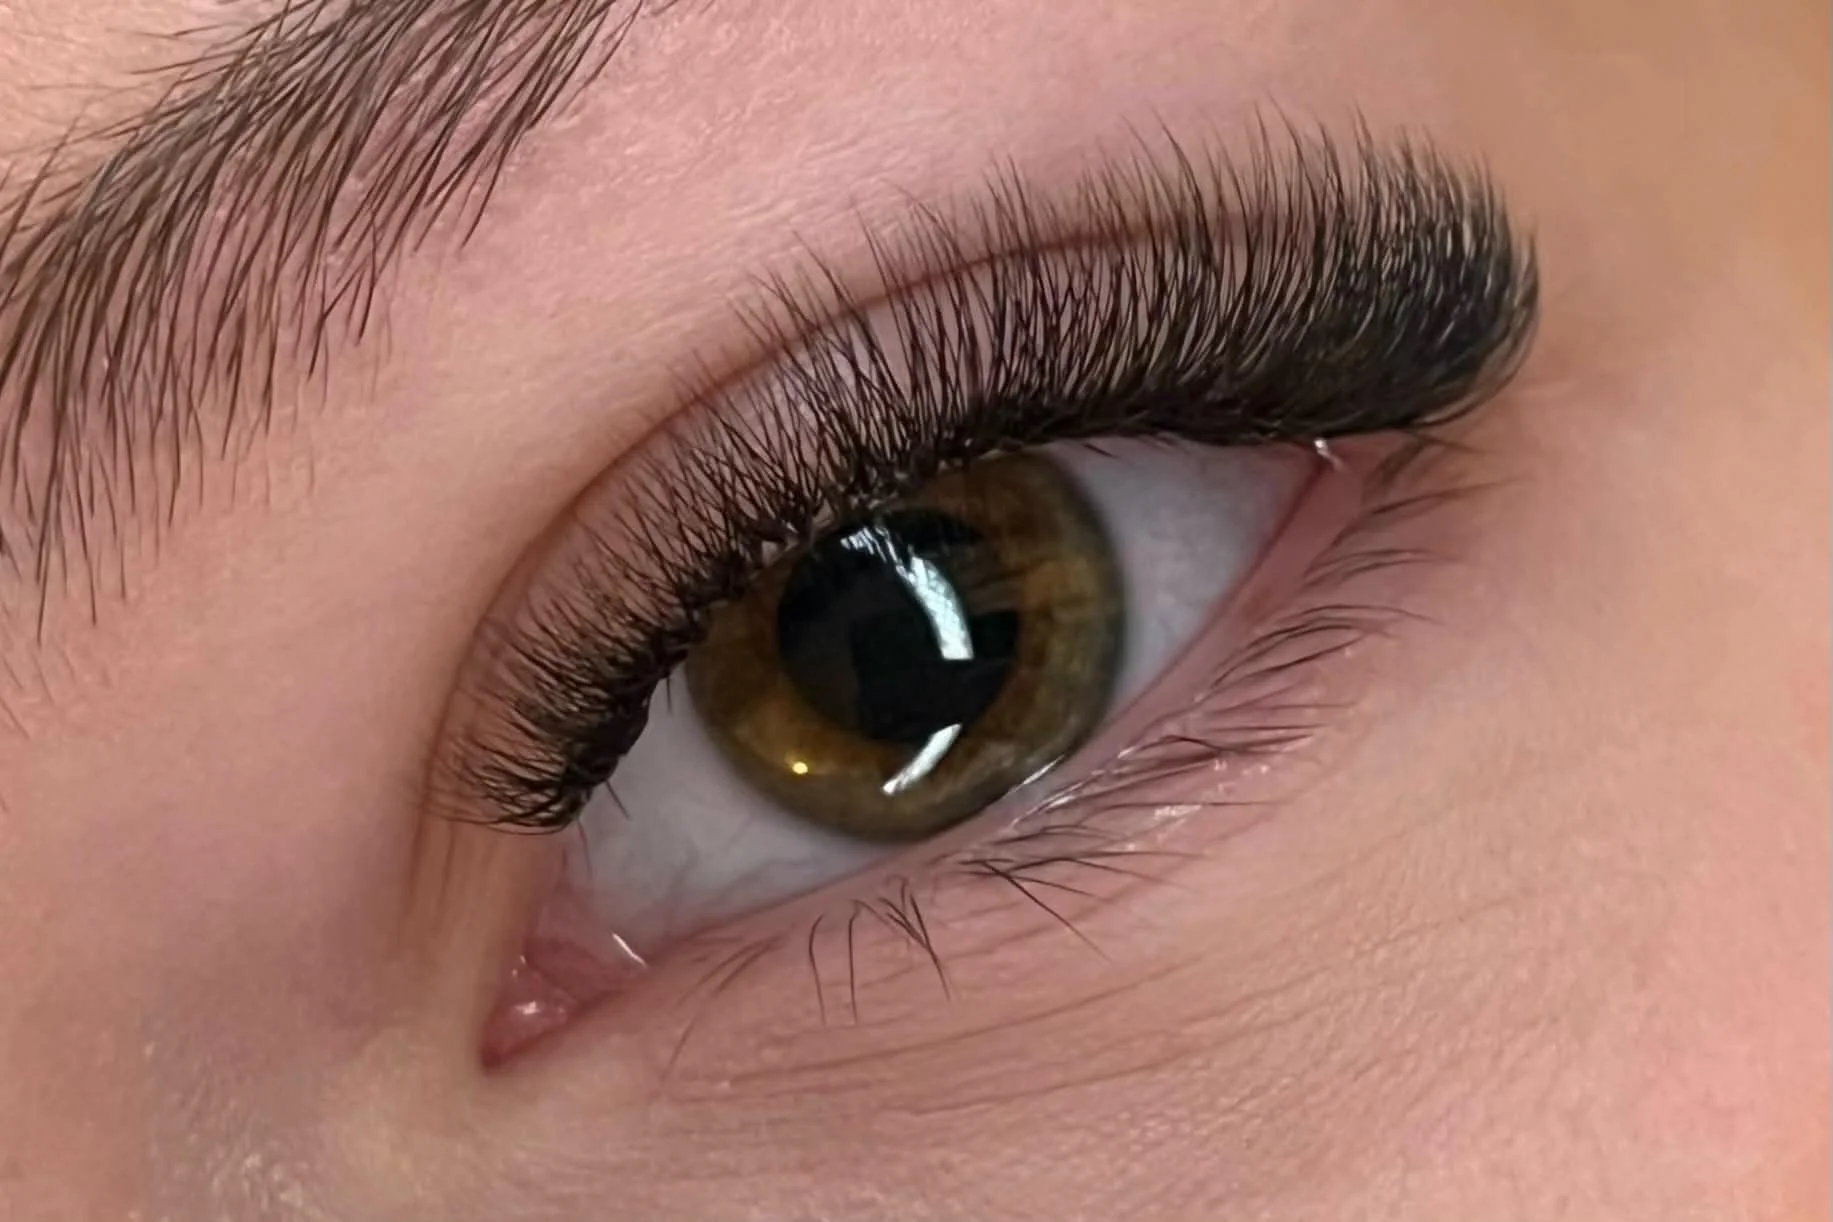
Lash extensions can visually change the appearance of the eyes.
Depending on your styling, you can create a result that appears:
more open
more elongated
softer
rounder
more lifted
more dramatic
more natural
A technically clean set can still look unbalanced if the styling does not suit the client's eyes.
Good lash mapping combines technical application with visual design.
That is why styling becomes increasingly important as your fundamental application skills improve.
Start With the Client's Natural Lashes
Before thinking about a styling name, look at the natural lashes.
Consider:
their length
strength
density
growth direction
layers
inner and outer corner lashes
any noticeable differences between the two eyes
Your map has to work with the natural lashes that are actually there.
You should not choose an extension simply because a diagram tells you to use a particular length.
The natural lash must be suitable for the extension being applied.
Then Look at the Eye Shape
Now look at the eyes as a whole.
Are they relatively round?
More almond shaped?
Close set or wider set?
Do the outer corners naturally appear lifted or do they turn down?
Is one eye slightly different from the other?
Real faces are not perfectly symmetrical.
Your goal is not to force every client into one standard map.
It is to understand how the placement of lengths influences the finished appearance.
Learn a Simple Natural Map First
Beginners do not need to start with complicated wispy maps.
A simple natural shape is an excellent place to begin.
You might gradually increase lengths from the inner corner, use your longer lengths through an appropriate central or outer section, then reduce them again towards the outer corner.
The exact numbers depend on the client's natural lashes and desired result.
The important part is learning how to create smooth transitions between sections.
If you jump suddenly from a very short extension to a much longer one, the finished set can look uneven.
Don't Become Too Attached to the Numbers
A lash map you see online might say:
7 - 8 - 9 - 10 - 11 - 12
That does not mean those exact lengths will suit every client.
One client's natural lashes may comfortably support that styling.
Another client's may not.
The same numerical map can also look different depending on:
curl
eye shape
natural lash direction
lash density
extension thickness
technique
placement
layers
Treat lash map numbers as a guide, not a universal formula.
Understanding the Inner Corners
Inner corner lashes are usually shorter and finer.
They can also be more difficult for beginners to isolate and access.
Using extensions that are too long in this area can make a set look heavy and unbalanced.
Learn to work with shorter lengths through the inner corner and transition gradually into the main body of the set.
Do not neglect the inner corners entirely.
Carefully styled inner lashes help the finished set look complete and polished.
Understanding the Middle of the Eye
The middle section has a major influence on how open or rounded the eye appears.
Placing the longest lengths around the centre can create a more open-eye effect.
Moving the peak slightly away from the centre changes the visual balance.
As a beginner, experiment with small changes rather than dramatically changing several elements at once.
That makes it easier to understand what each adjustment actually does.
Understanding the Outer Corners
Many clients ask for a cat-eye effect because they want elongated eyes.
But simply putting the longest lashes at the very outer corner does not automatically create a flattering cat eye.
Natural outer lashes can sometimes grow downward or become finer towards the edge.
Extremely long extensions at the very end may visually pull the eye down rather than lift it.
Often, shortening the final section creates a cleaner finish.
This is why understanding the client's natural eye and lash direction matters more than blindly following a cat-eye diagram.
What Is a Cat-Eye Lash Map?
A cat-eye style generally creates increasing length towards the outer portion of the eye to produce an elongated appearance.
But there are many variations.
The longest point does not necessarily need to sit on the final lashes.
You can position the peak before the outer corner and then reduce the lengths slightly at the end.
This can create elongation without making the outer edge appear heavy.
As you gain experience, you can adjust the position of the longest section to suit different eyes.
What Is an Open-Eye Lash Map?
An open-eye map generally places more emphasis and length around the central part of the eye.
Lengths then become shorter towards both corners.
This can visually draw attention upwards and towards the centre.
Again, the styling name is only the starting concept.
You still need to adjust lengths and curls according to the client's natural lashes and desired result.
What Is a Squirrel Lash Map?
A squirrel-style map generally increases in length towards the outer portion of the eye, reaches its longest point before the very outer corner, then becomes shorter again.
This can create a lifted effect without extending maximum length all the way to the edge.
For beginners, understanding where the peak of a map sits is more useful than trying to memorise every named style.
Move the peak and you change the visual effect.
Should Beginners Learn Wispy Lash Mapping?
Eventually, yes, but first understand a clean basic map.
Wispy styling introduces additional variables such as spikes, texture and different lengths working together.
If you do not yet understand the underlying base shape, adding spikes can make the design unnecessarily confusing.
Learn to create a balanced Classic, Hybrid or Volume shape first.
Then you can build texture on top of that foundation.
How to Draw a Lash Map
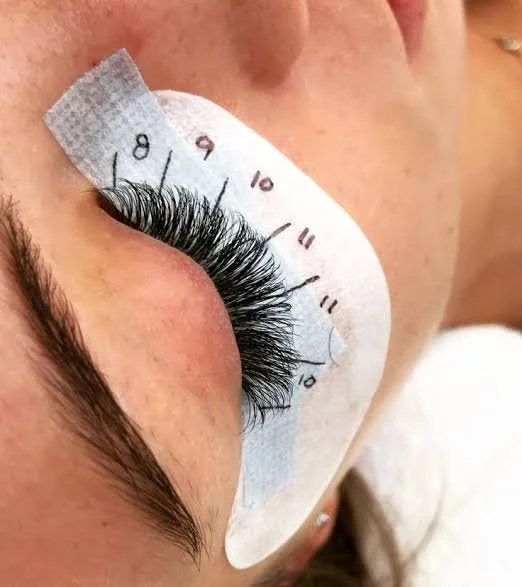
Under-eye pads are commonly used as the surface for marking your sections.
Once the client's eyes are closed and the pads are positioned correctly, you can mark the sections beneath the lash line.
You might:
Identify the main points of the eye.
Divide the lash line into manageable sections.
Write the intended extension length in each section.
Check that the transitions make sense.
Adjust the map if the natural lashes require it.
Your lines do not have to look like perfect artwork.
The purpose of the map is to help you work consistently.
How Many Sections Should a Beginner Use?
You do not need an excessive number.
Too many tiny sections can make your first maps harder to follow.
Start with enough sections to create gradual length transitions while still keeping the design simple.
As your understanding develops, you can make your maps more detailed when the style requires it.
Simple does not mean unprofessional.
A simple map executed beautifully is better than a complicated map you cannot control.
Smooth Transitions Make a Big Difference
One of the easiest ways to improve your lash styling is to pay attention to transitions.
Imagine one section uses 9 mm and the next suddenly jumps to 13 mm.
That dramatic change may create a visible step in the lash line.
Gradually increasing and decreasing lengths usually produces a more polished result.
You can also blend neighbouring lengths around section boundaries rather than treating each line as an absolute wall.
The finished lashes should flow together.
Lash Curl Changes the Map Too
Length is only one part of styling.
Curl can significantly change how an extension appears from the front.
Two extensions with the same measured length but different curls can create very different visual effects.
Beginners sometimes concentrate so heavily on map numbers that they forget about curl.
As your training develops, learn how the curls you use behave and how they interact with different natural lash directions.
Do not change lengths, curls and styling dramatically all at once while you are still learning.
Make controlled changes so you can understand the result.
Mapping Is Different From Safe Lash Selection
This distinction is important.
A map tells you the visual design you want to create.
It does not override safe extension selection.
If your map says a certain length but the natural lash in front of you is too fine, short or weak for that extension, adapt the plan.
Protecting the natural lashes comes before following the map perfectly.
Professional styling requires both design and technical judgement.
Photograph Your Finished Maps and Results
A useful way to learn styling is to keep records.
Take a photograph of the finished lashes and, when appropriate, record the map you used.
Later, compare them.
Ask yourself:
Did the longest point sit where I expected?
Did the eye look more open or elongated?
Were the inner corners too long?
Did the outer corner look lifted or heavy?
Were the transitions smooth?
This turns each client or model into a styling lesson.
Over time, you build your own library of maps and results.
Don't Copy Instagram Maps Without Understanding Them
Social media can be useful for inspiration.
But a beautiful map posted by another lash artist was created for a particular set of eyes, natural lashes and desired result.
Copying the numbers does not guarantee the same result on your client.
Instead, study the design.
Where does it become longer?
Where is the peak?
Where does it shorten?
What visual effect does that create?
Once you start analysing maps this way, you move from copying lash maps to understanding lash styling.
Practise Mapping Without a Client
You can practise styling even when you do not have a model available.
Use printed eye photographs, training materials or sketches and create different maps.
Ask yourself how you would make the same eye appear:
more open, more elongated, softer or more lifted.
This is an excellent addition to your practical lash training.
For more ideas on developing your technique between appointments, read how to practise lash extensions as a beginner.
Keep Your First Maps Simple
Beginners often want to create advanced sets because those are the photographs that attract attention online.
But complicated does not automatically mean better.
A beautifully executed simple set demonstrates strong fundamentals.
Focus first on:
clean isolation, correct attachment, safe placement, consistent direction, appropriate lengths and a balanced map.
Once those foundations are strong, adding advanced styling becomes much easier.
Mapping Gets Easier With Experience
At the beginning, you may need to think carefully about every section.
Later, you will begin recognising patterns almost immediately.
You will look at a client's eyes and start visualising where you want the longest point to sit.
You will know when an outer corner needs shortening.
You will recognise when the same map you used on the previous client would not suit the next one.
That judgement develops through education, observation and repeated practical work.
It is one of the reasons becoming good at lashes takes time.
If you are wondering about the wider learning process, I explain how long it takes to get good at lash extensions in another guide.
Your Lash Map Should Serve the Client
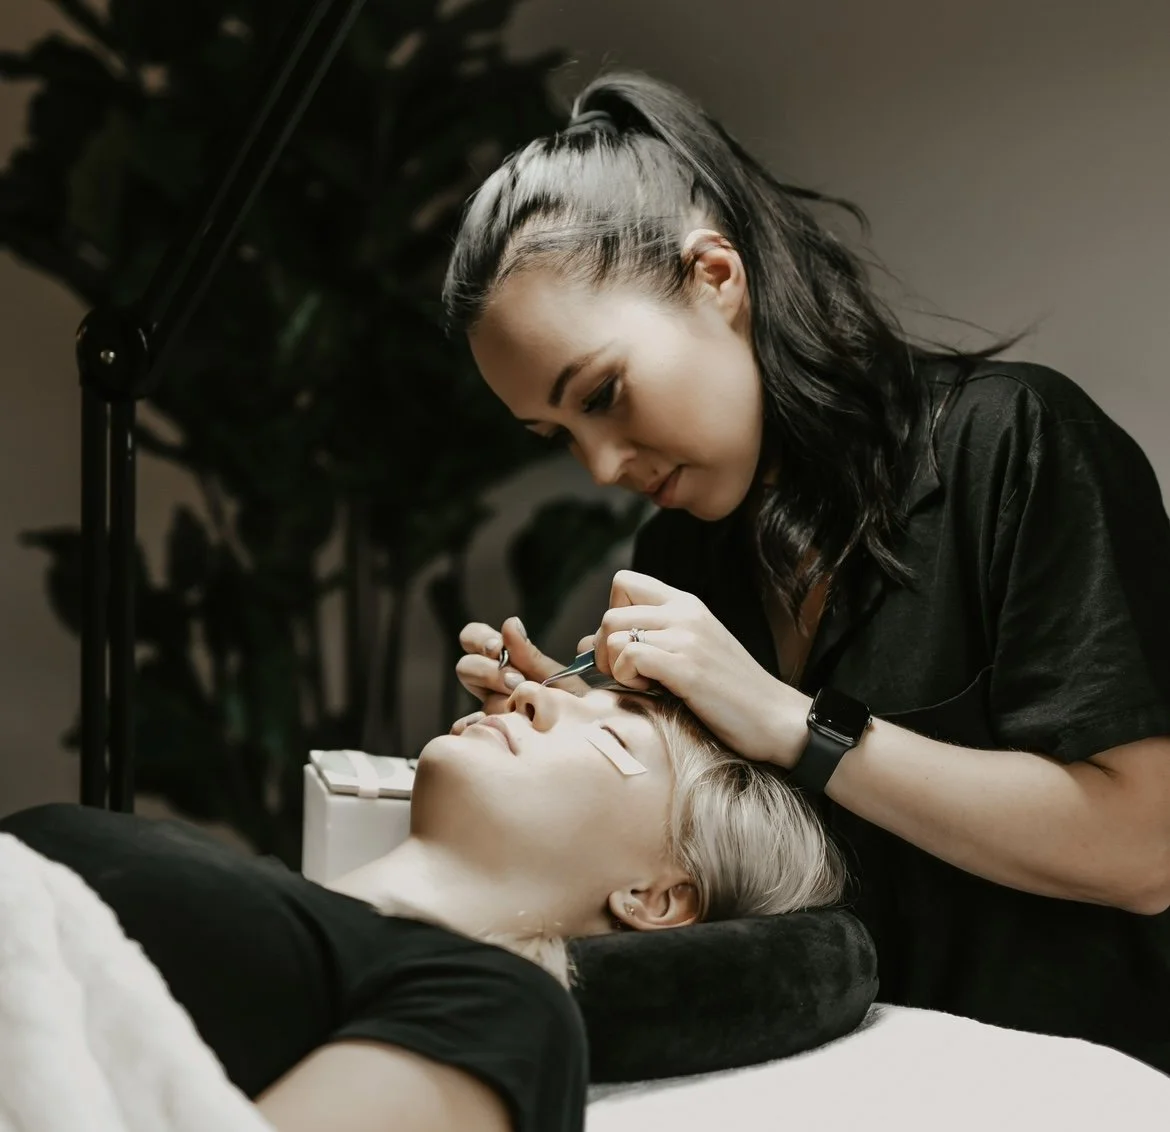
The purpose of lash mapping is not to prove how complicated your styling can be.
It is to help create a flattering, safe and intentional result for the person in front of you.
Start simple.
Understand what changing the peak does.
Learn how lengths transition.
Observe how eye shape and natural lashes affect your plan.
Photograph your work.
Review the result.
Then adjust next time.
That process will teach you far more than memorising dozens of diagrams.
Ready to Learn Lash Styling Step by Step?
My Online Lash Course is designed for complete beginners and teaches Classic, Hybrid and Premade Volume techniques, including the foundations you need to begin understanding professional lash styling.
You'll receive lifetime access and personal support while you practise and develop your skills.
